During this room, we will be covering the basics of the programming language JavaScript.
The main purpose of this language is to implement interactiveness into webpages and web applications.
We can use JavaScript to control servers, create video games, code mobile applications, and can even be used for cybersecurity in some scenarios.
Here are a few things we will be covering during this room:
Variables
Conditionals
Functions
Objects
Loops
DOM (Document Object Model)
XSS (Cross-Site Scripting)
Here is what you’ll need before beginning this room:
IDE or Text Editor of your choice (I recommend VS Code or Atom)
One final note.This room will not cover everything JavaScript can do, not even close. This room will be targeted towards beginners who are looking to learn basic programming logic and an easy to use.
VARIABLES AND OPERATORS
Before diving into JavaScript, remember:
Using “//” within your IDE or text editor are considered comments
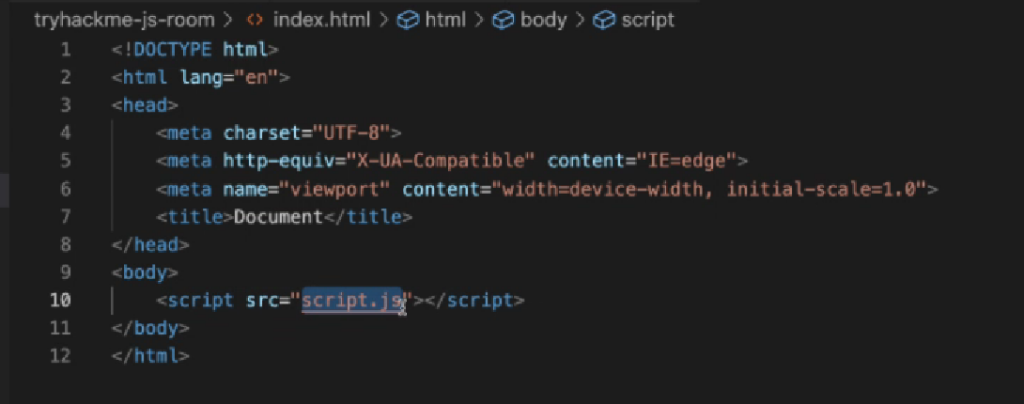
We will be using Chrome dev tools for this room, so for this, we’ll need to link our JavaScript file to an HTML file.
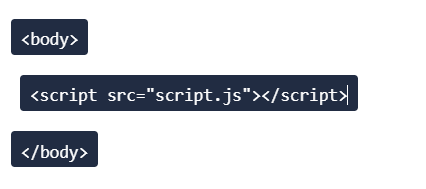
Example : Showing to add SCRIPT file.
Remember to put the script tag right before the closing body tag. This way our HTML code will execute before our external JavaScript document.
Variables :
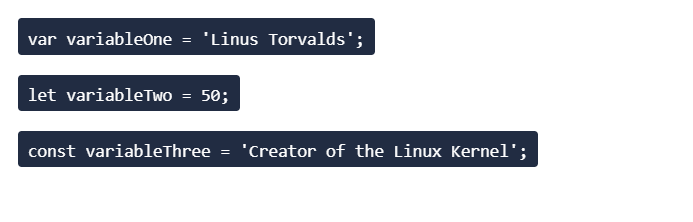
There are 3 types of variables in JavaScript: var, let, and const.
The var (variable) keyword was originally the only variable available, but we now have multiple ways of declaring a variable or data types.
Quick Overview:
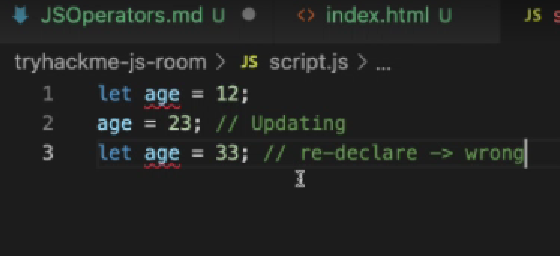
let: If a variable is going to be reassigned later within the application, this is the ideal variable type to use.
var: It’s better to use either let or const for variables, but this variable type will still work and is still used in applications to this day. This variable can be updated and re-declared.
const: If the variable will never change or won’t be reassigned anywhere else in the application, this keyword is the best option.
Points to remember:
The var variable is globally scoped and can be updated and re-declared.
The let variable is block-scoped and can be updated but not re-declared.
The const variable is block-scoped and cannot be updated or re-declared.
Global Scope: A variable declared outside a function. This means all scripts and functions on a web application or webpage can access this variable.
Block Scope: A variable declared inside a block. This means we can use these variables inside of loops, if statements, or other declarations within curly brackets and have them be only used for that declaration instead of the entire application having access to it.
Variables are very easy to use and understand in JavaScript, they can store a lot of information with very little code.
Main data types that you can store within a variable:
Data Type
Example
Number
200
String
'Neo'
Boolean
True or False
There are also arrays, objects, and many many more data types that we will learn during this room. Variables are wonderful, but they aren’t very powerful on their own, this is where arithmetic operators, comparison operators, and boolean operators come into play. It may sound complicated, but these tables should make everything a little easier to understand!
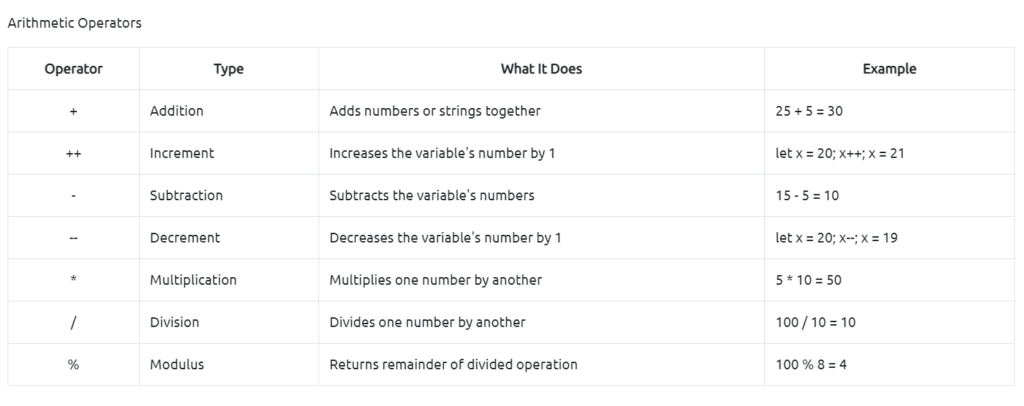
Operators:
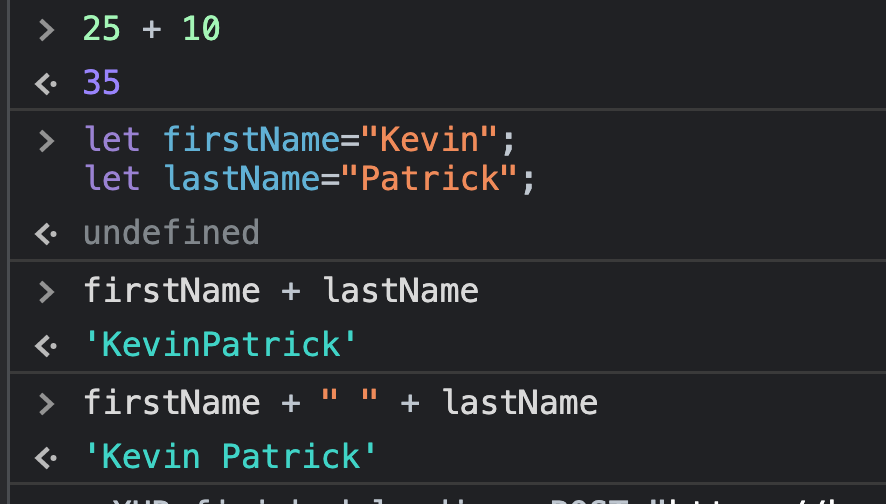
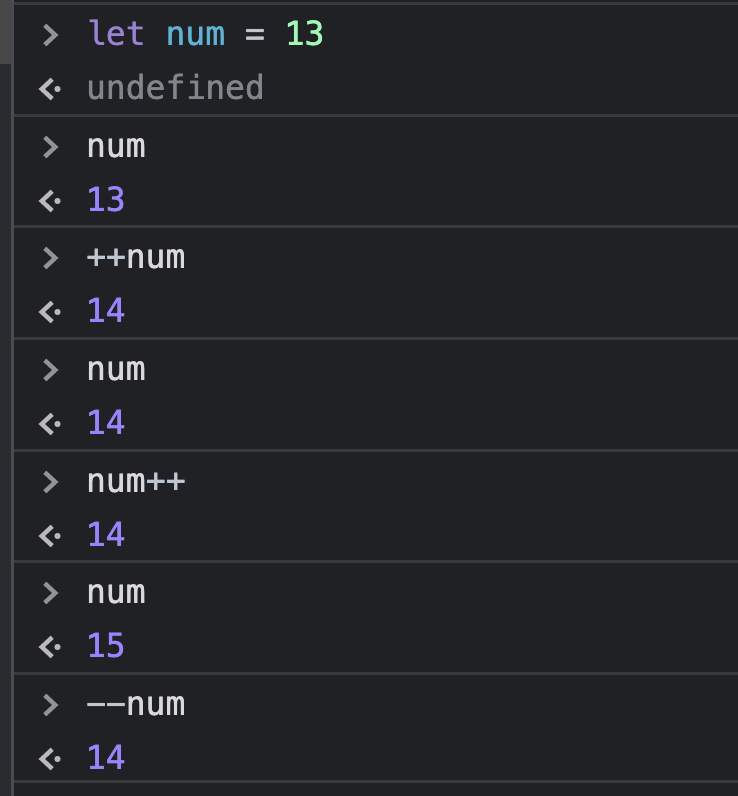
Sample for addition operator.
Sample for subtracton and decrement operator
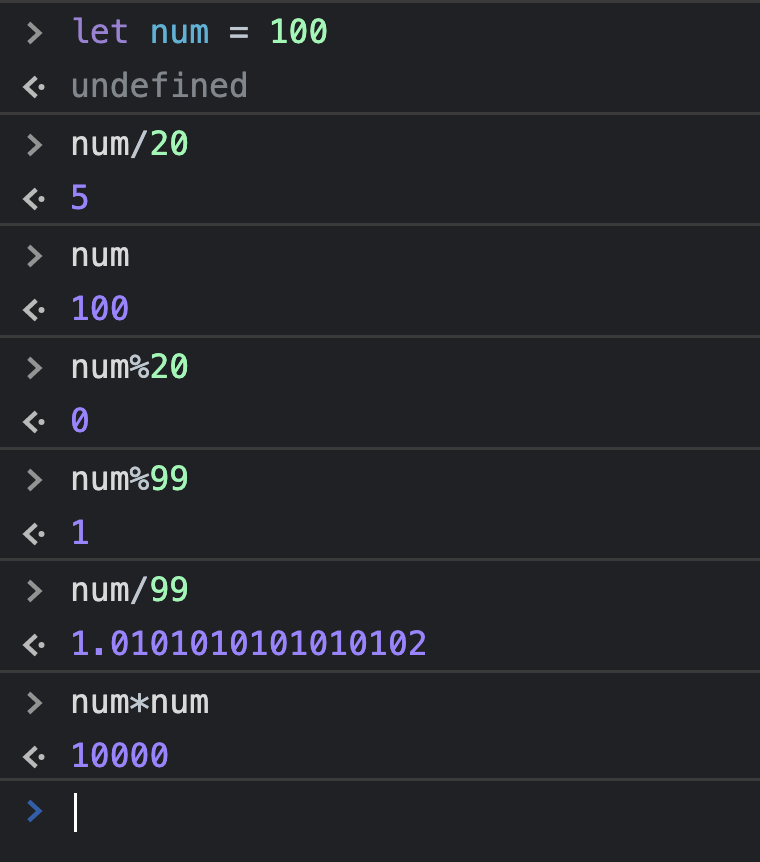
Sample for multiplication, division and modulus operator
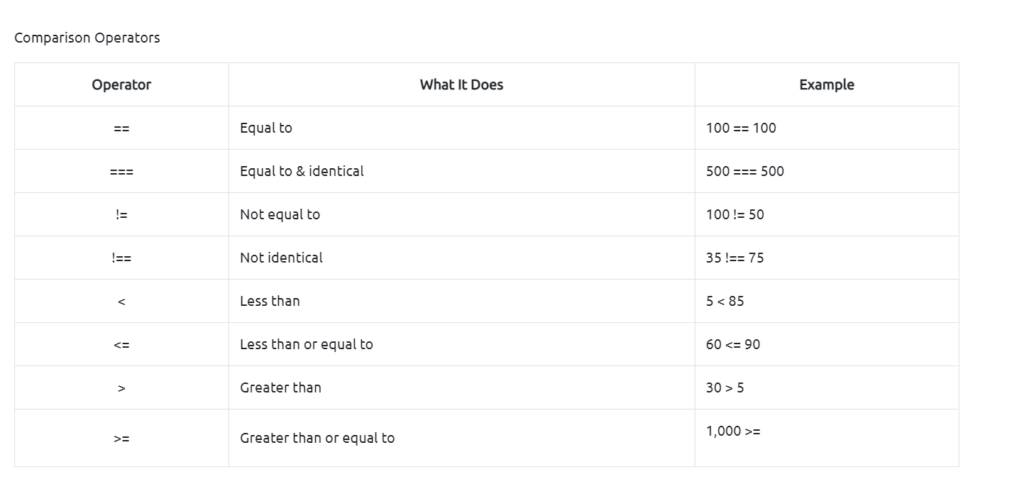
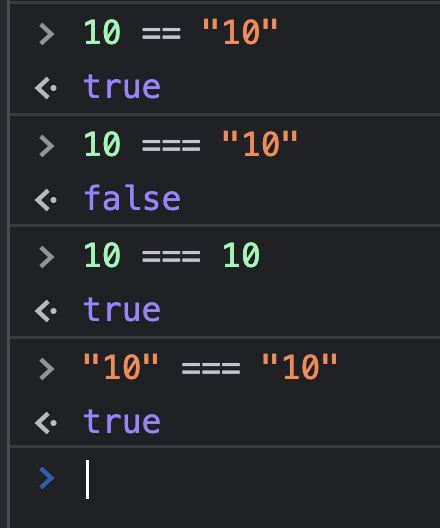
Sample for some of the comparison operators
These two tables cover the majority of what we will be going over moving forward, but there are still so many more things that we won’t be able to cover. Once you finish learning about the basics of JavaScript, I recommend researching more about operators as there are still boolean operators (true or false) and logical operators (AND, OR, NOT).
It’s time to see the available types of data that we can store within our variables. This will cover some of the basics you’ll be using for this room.
if (5 === 5){
console.log('Hello World!');// Prints Hello World! to the console
};
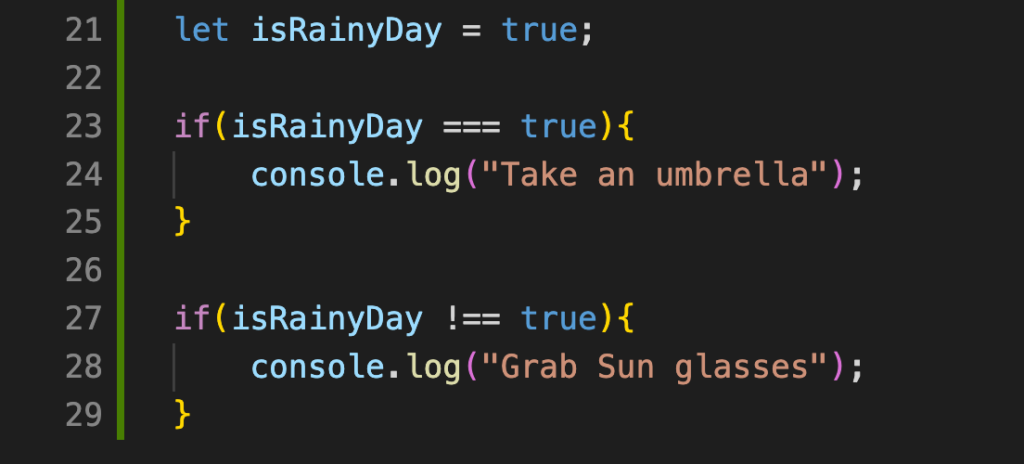
If a condition is met, then the code will run. Remember all those operators we learned about in the first task? We can use those to define these conditions and plan our approach.
There are also else if statements, which look like this:
if (5 === 10) {
console.log(`5 is equal to 10`); // skips this code
} else if(10 === 10){
console.log(`5 is not equal to 10`);
// Prints "5 is not equal to 10" to the console
}
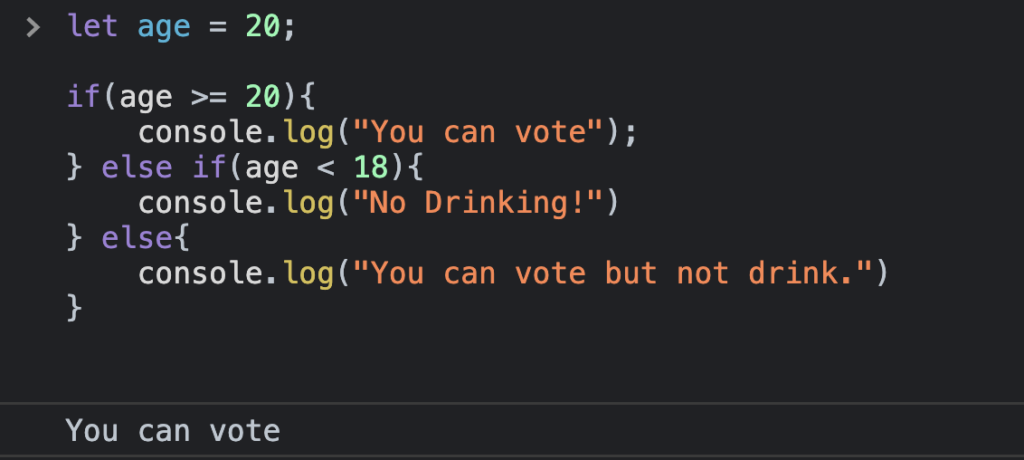
This way we can have multiple conditions before our code executes. Normally, we’d end our code with an else statement like this:
if (5 === 10){
console.log('Hello World!'); // Skips this code
} else if (10 === 10) {
console.log('Hello World!');// Prints Hello World! to the console
} else {
console.log('ERROR ERROR ERROR');
};
Basically, the else keyword concludes our if conditional. We’ll learn a better way of writing conditionals later, but for now, this is a clear way of using a condition to return a result.
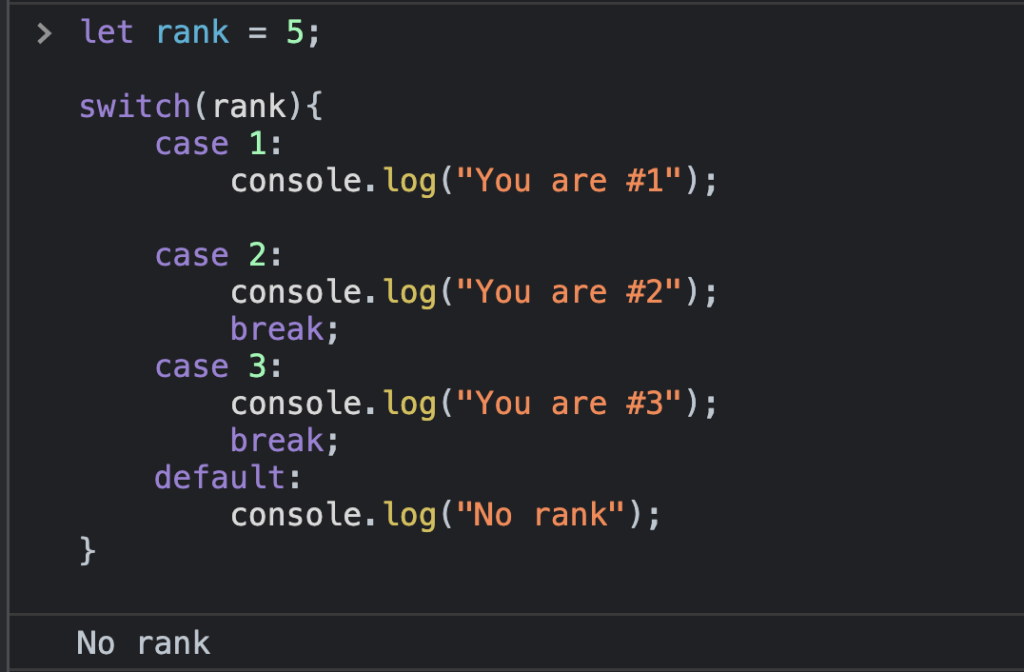
Switch Cases
If you need to test multiple conditions, then most of the time switch cases are best for optimization and readability within your code. If, else-if, else statements and switch cases can both do similar tasks, but switch cases are better for performing multiple different conditions. Here’s how a switch case looks:
const animal = 3;
switch (animal) {
    case 1:
        document.write('Cow');
        break;
    case 2:
        document.write('Chicken');
        break;
    case 3:
        document.write('Monkey');
        break;
    default:
        document.write('Animal?');
} // Outputs Monkey
We use each case to define a number, have our variable hold the number we’re pulling from, and the break keyword is used for ending that specific case or switch block. The default keyword is there just in case our variable is equal to something that isn’t present in our switch…case code.
Thank you So much for reading my blog. Part #2 will be coming soon 🙂